Diagrammatic Rules for Jarah Diagrams
These rules are currently being used by myself and no one else, it is by no means standard or widely accepted. I find it extremely fun to play with those rules and diagrams.
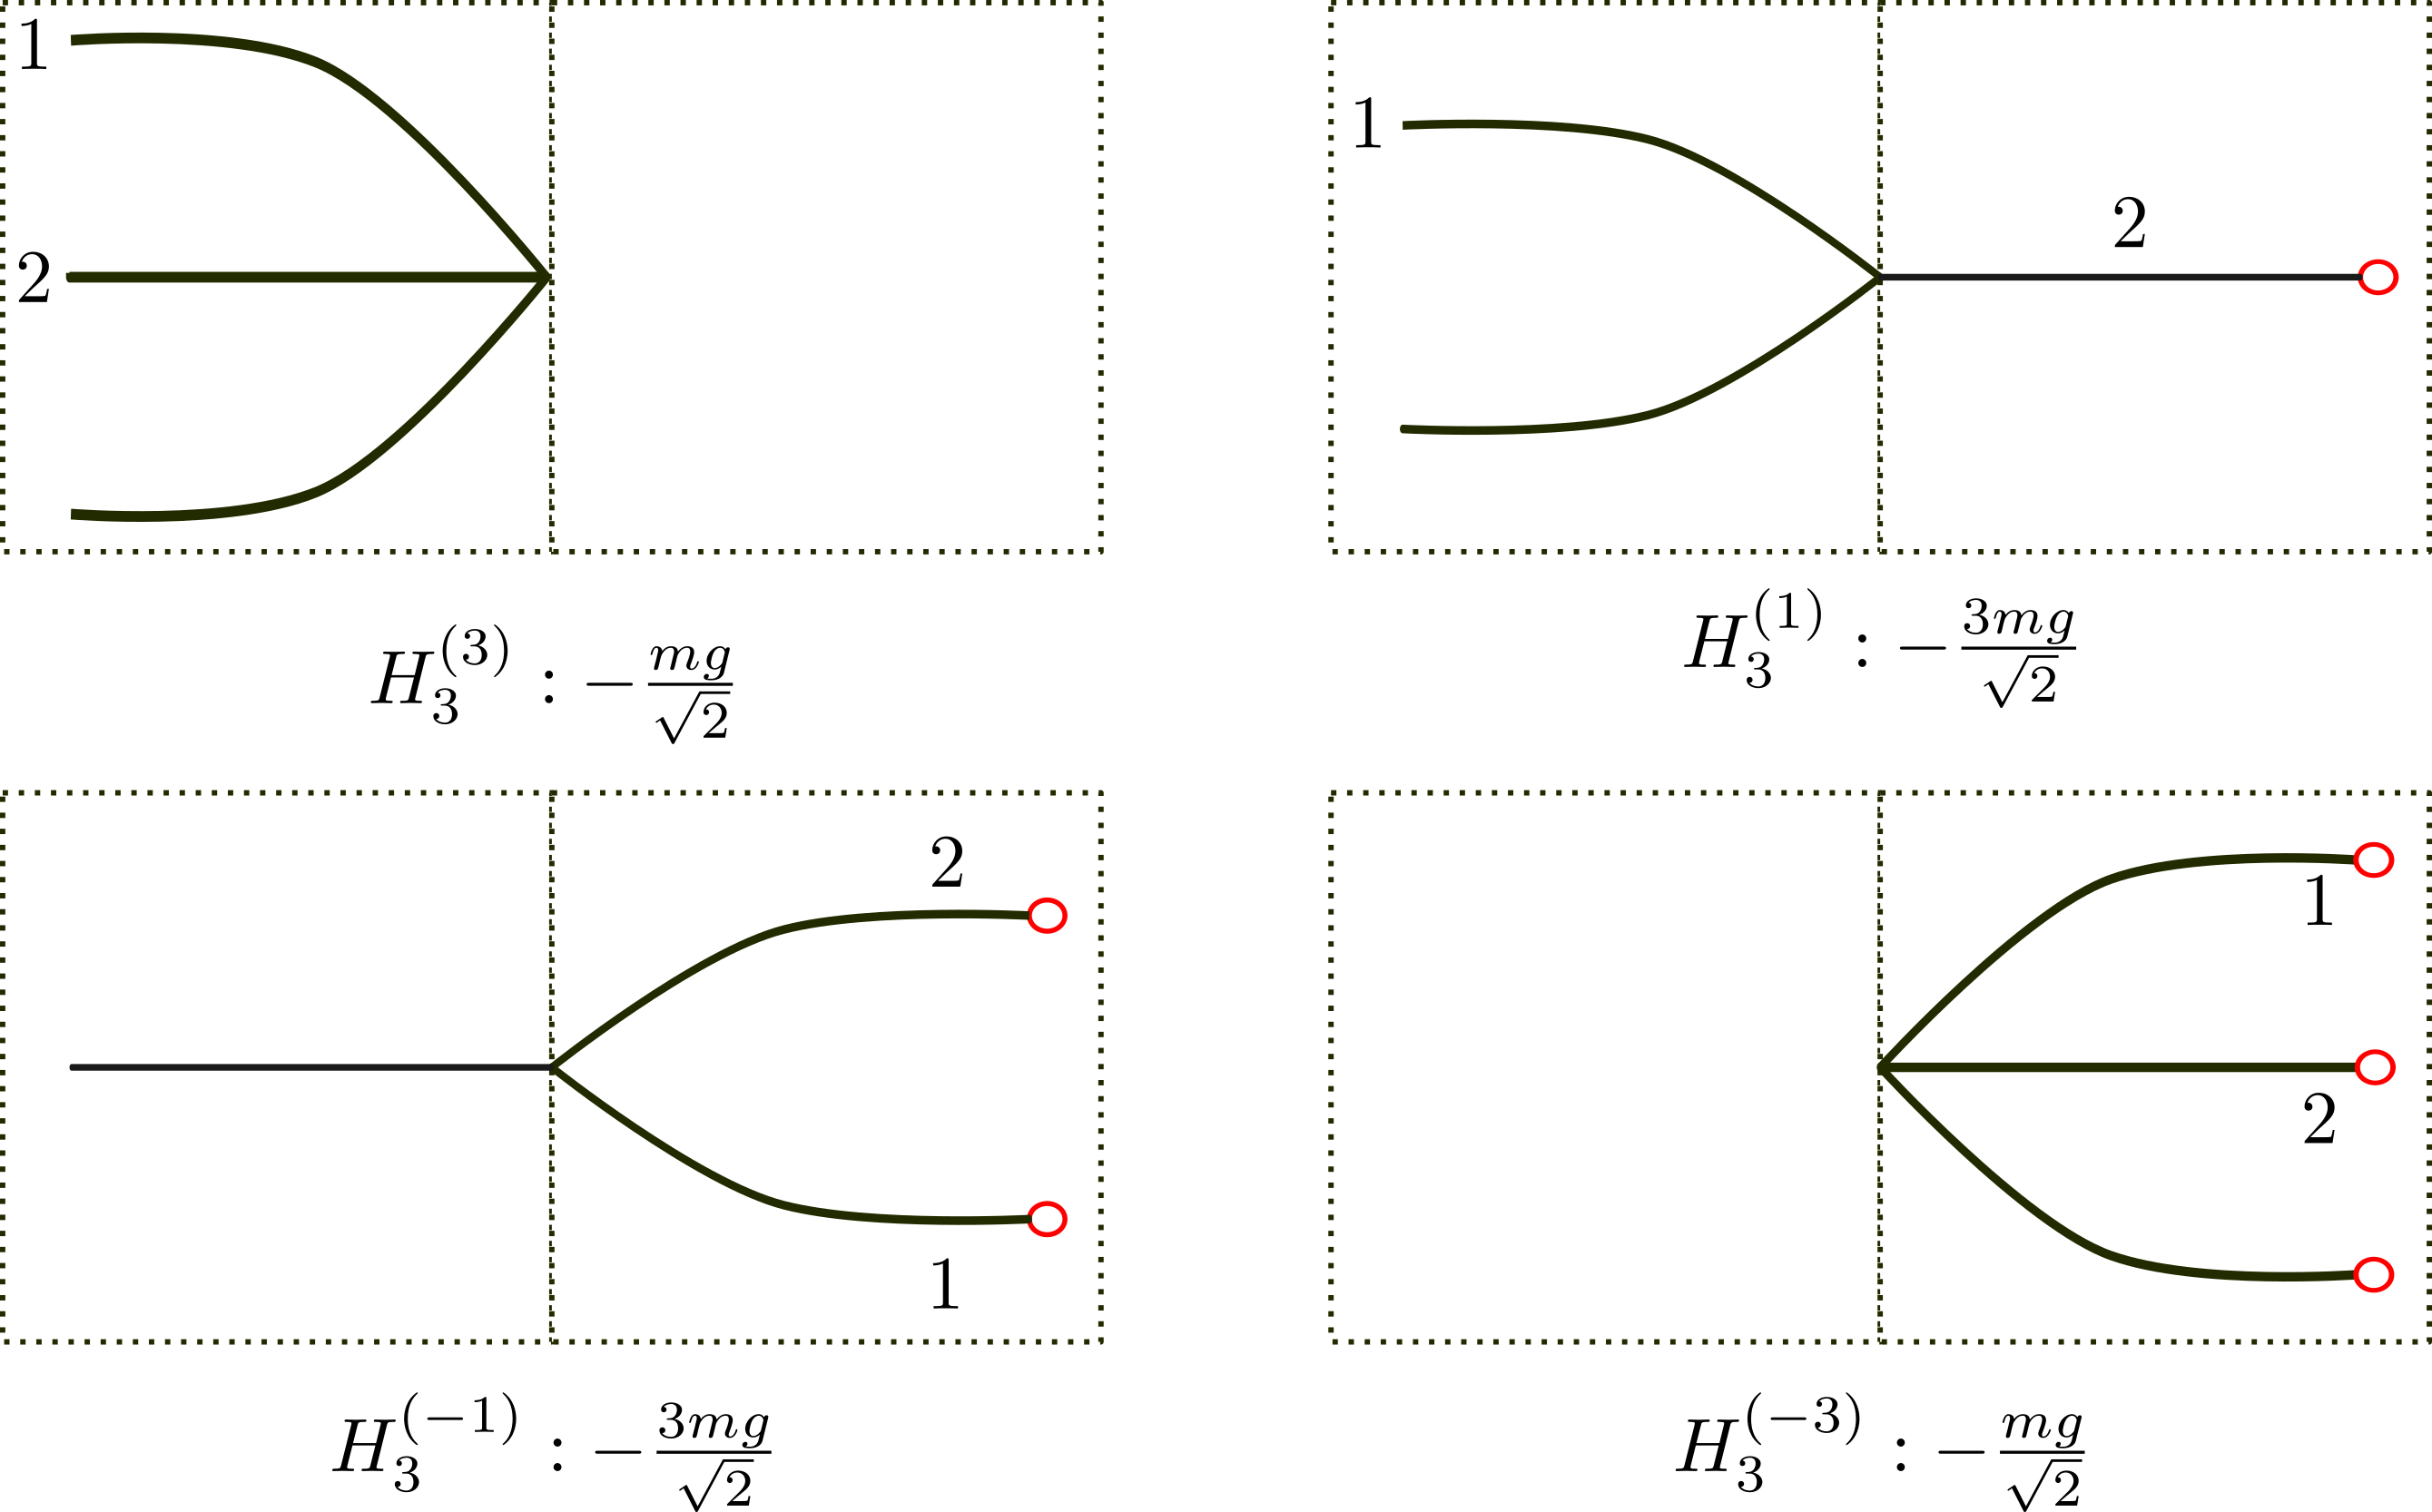
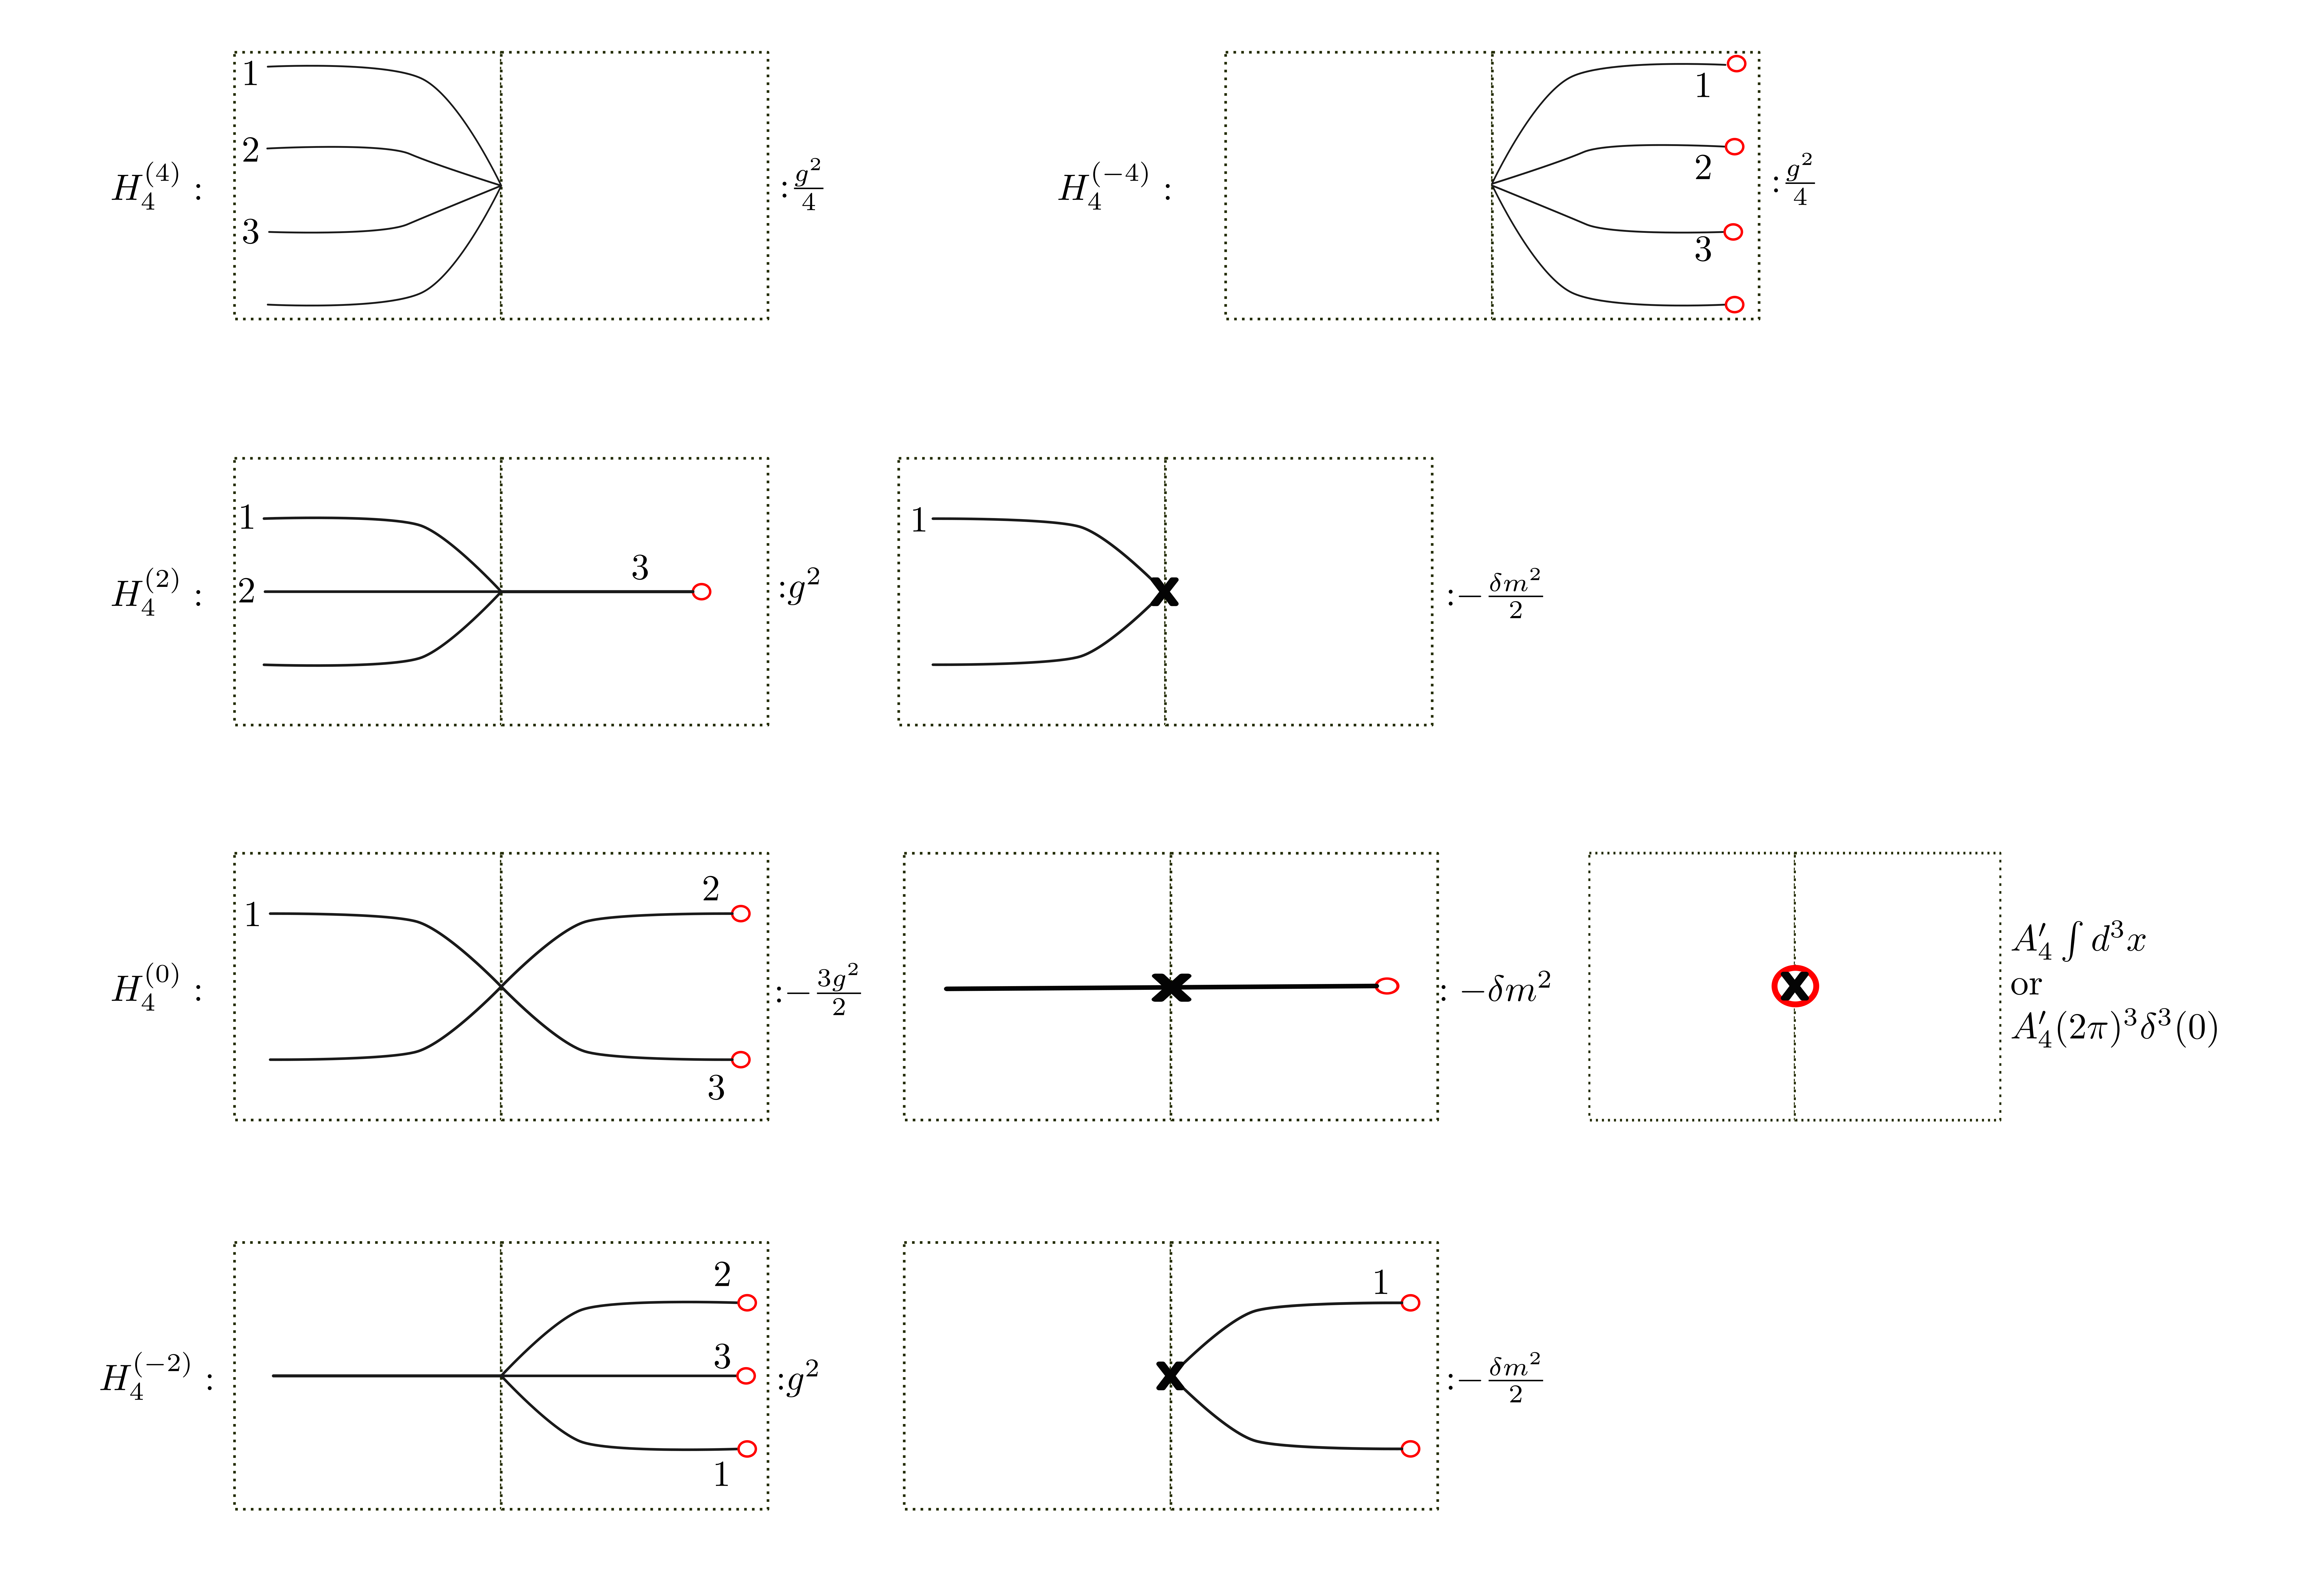
The rules are shown in the figures below. The numbers label the momentum, for example $1$ stands for $\vec{p}_ {1}$. We only need to label the independent momenta for two reasons: 1) each vertex conserves the momenta hence we can fix the not-labeled momentum without problem and 2) it is important to balance the momenta and delta functions, as we will explain later. One of the various kinds of divergences, namely a factor of $(2\pi)^{3}\delta^{3}(0)$ or equivalently (not mathematically rigorously though) $\int d^3x$ comes from the fact that the Dirac delta functions over-determine the momenta, it is also included in the diagrammatic method.
In the following rules, some factors (such as a factor of 3) is perhaps better treated as symmetry factors, but for practical purpose I treat them as part of the definition of the the vertices.
I note that the diagrams I have are used to calculate quantities such as $H_ {3}\left\lvert \vec{p} \right\rangle_ {1},H_ {4}\left\lvert \Omega \right\rangle_ {2}$ only, in order to obtain the final state we need to further invert some operators. The inversion is quite straightforward though.
Rules for Hamiltonians
Rules for $H_ {3}^{(-)}$

Rules for $H_ {4}^{(-)}$

Feynman-like Rules
With above ingredients we may introduce the rules to connect them now.
Roughly speaking we find all the possible way to concatenate a Hamiltonian to a state. Each red circle indicates that it must be concatenated to some other line to form a propagator, if not the diagram vanishes. After the concatenation we still need to balance the momenta against the delta functions (I am not sure if balance is the right verb here), as we will explain shortly.
For example, say we want to calculate $H_ {4}^{(2)}\left\lvert \Omega\right\rangle_ {0}$, we need to do the following:
- Find the diagrams corresponding to $H_ {4}^{(2)}$, there are two of them. Find the diagram corresponding to $\left\lvert \Omega \right\rangle_ {0}$, there is only one.
- Put the diagrams from $H_ {4}^{(2)}$ on the left and that from $\left\lvert \Omega \right\rangle_ {0}$ on the right, with all the independent momenta labeled in the fashion that is given in the figures below. Find all the possible ways to concatenate them.
- For each concatenation, write down the symmetry factor first. There is usually more than one way to connect a circle to a leg (in the diagram of $\left\lvert \Omega \right\rangle_ {0}$), the number of doing that is the symmetry factor.
- If a circle is connected to two independent labeled momenta, we’ll call it “fully labeled.” If it’s connected to only one labeled momentum, we’ll call it “half-labeled.” Arrange the labels so that as many circles as possible are fully labeled. Each circle will cancel out a connected momentum, and you can cross them off simultaneously. If a circle isn’t connected to any labeled momentum, chance is they will survive the balancing process and give us a divergent factor. It’s easier than it sounds. Once you’ve crossed them off, replace the circle with an arrow pointing in the direction of increasing coupling. A line with an arrow represents a regular propagator.
- If there is a circle that no matter how to label and re-label the independent momenta still can’t be eliminated, keep it, a circle connected with two legs is an irregular propagator, it will contribute a factor of $\int d^{3}x$, or $(2\pi)^{3}\delta^{3}(0)$.
- Use the momentum conservation at each vertex to write down the momentum for each leg, external and internal. They should all be expressed in terms of independent momenta.
- Read from left to right, don’t forget to write down the symmetry factor. The left-most external legs give us the final state, each of them gives us an momentum eigenstate. If there is not a single leg then the state is $\left\lvert \Omega \right\rangle_ {0}$. Whenever you see an independent momentum, write the integral measure $\int d^3p / (2\pi)^{3}$. Whenever you see a propagator, write down the corresponding factor, which is listed in the figure below. Write down the expression for the vertex and the state.
- Simplify and check.

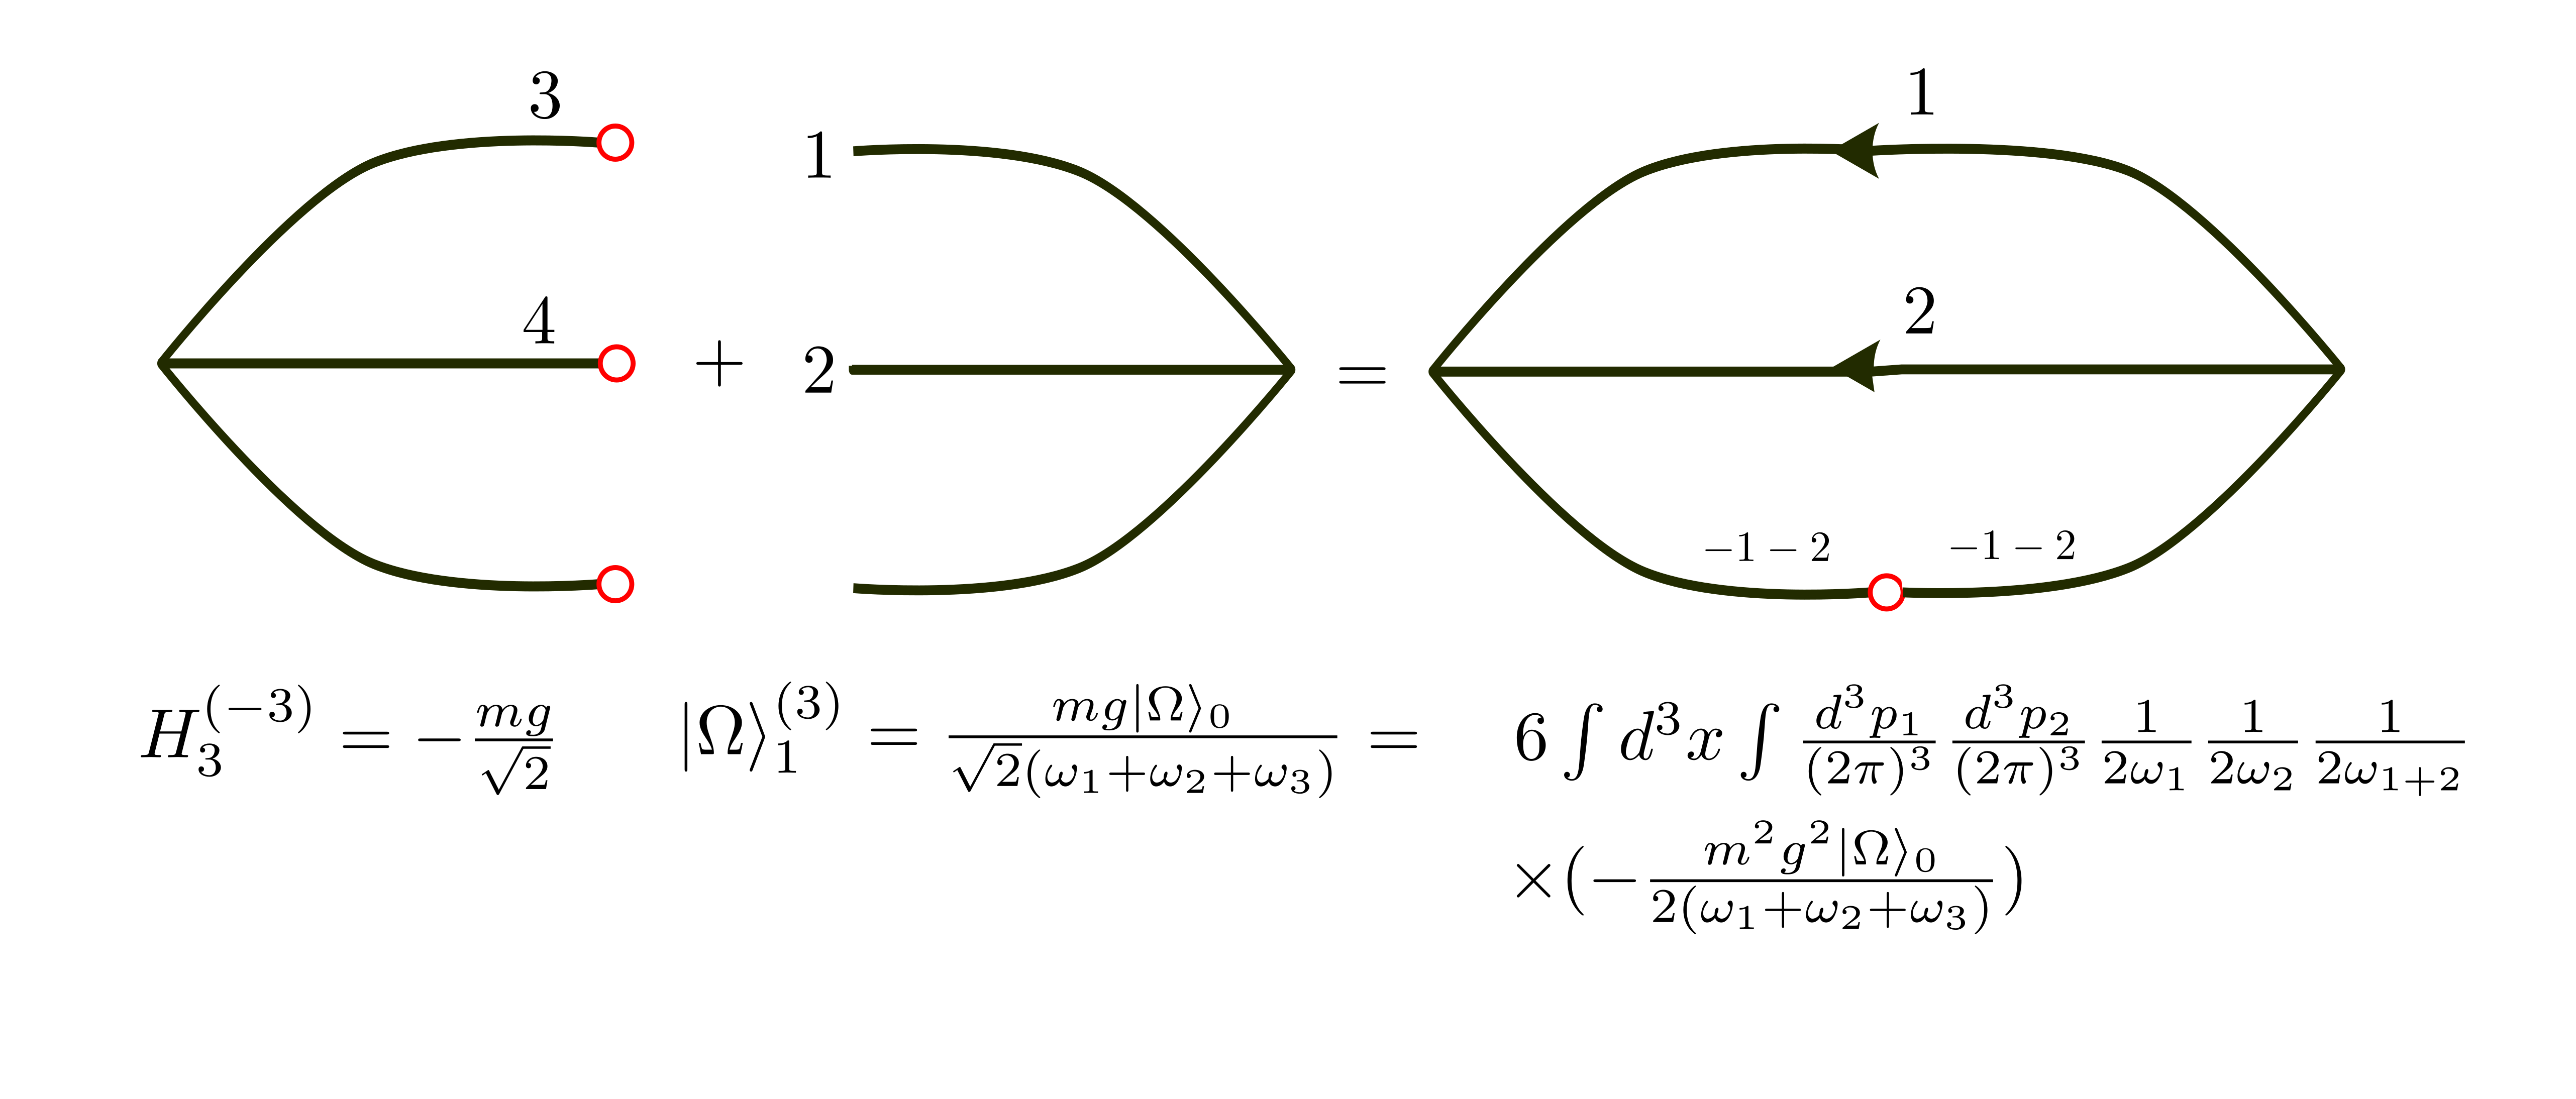
Some examples

Enjoy Reading This Article?
Here are some more articles you might like to read next: